
Before entering your real cases, we recommend exploring the app with sample data. You’ll see how a complete matter file works, how to add a hearing, how to navigate between sections — all without any risk. When you’re done, the sample data can be removed in just a few minutes.
How to generate sample data
Open Settings from the icon in the top right, scroll down to the Tools section and tap Generate Sample Data.
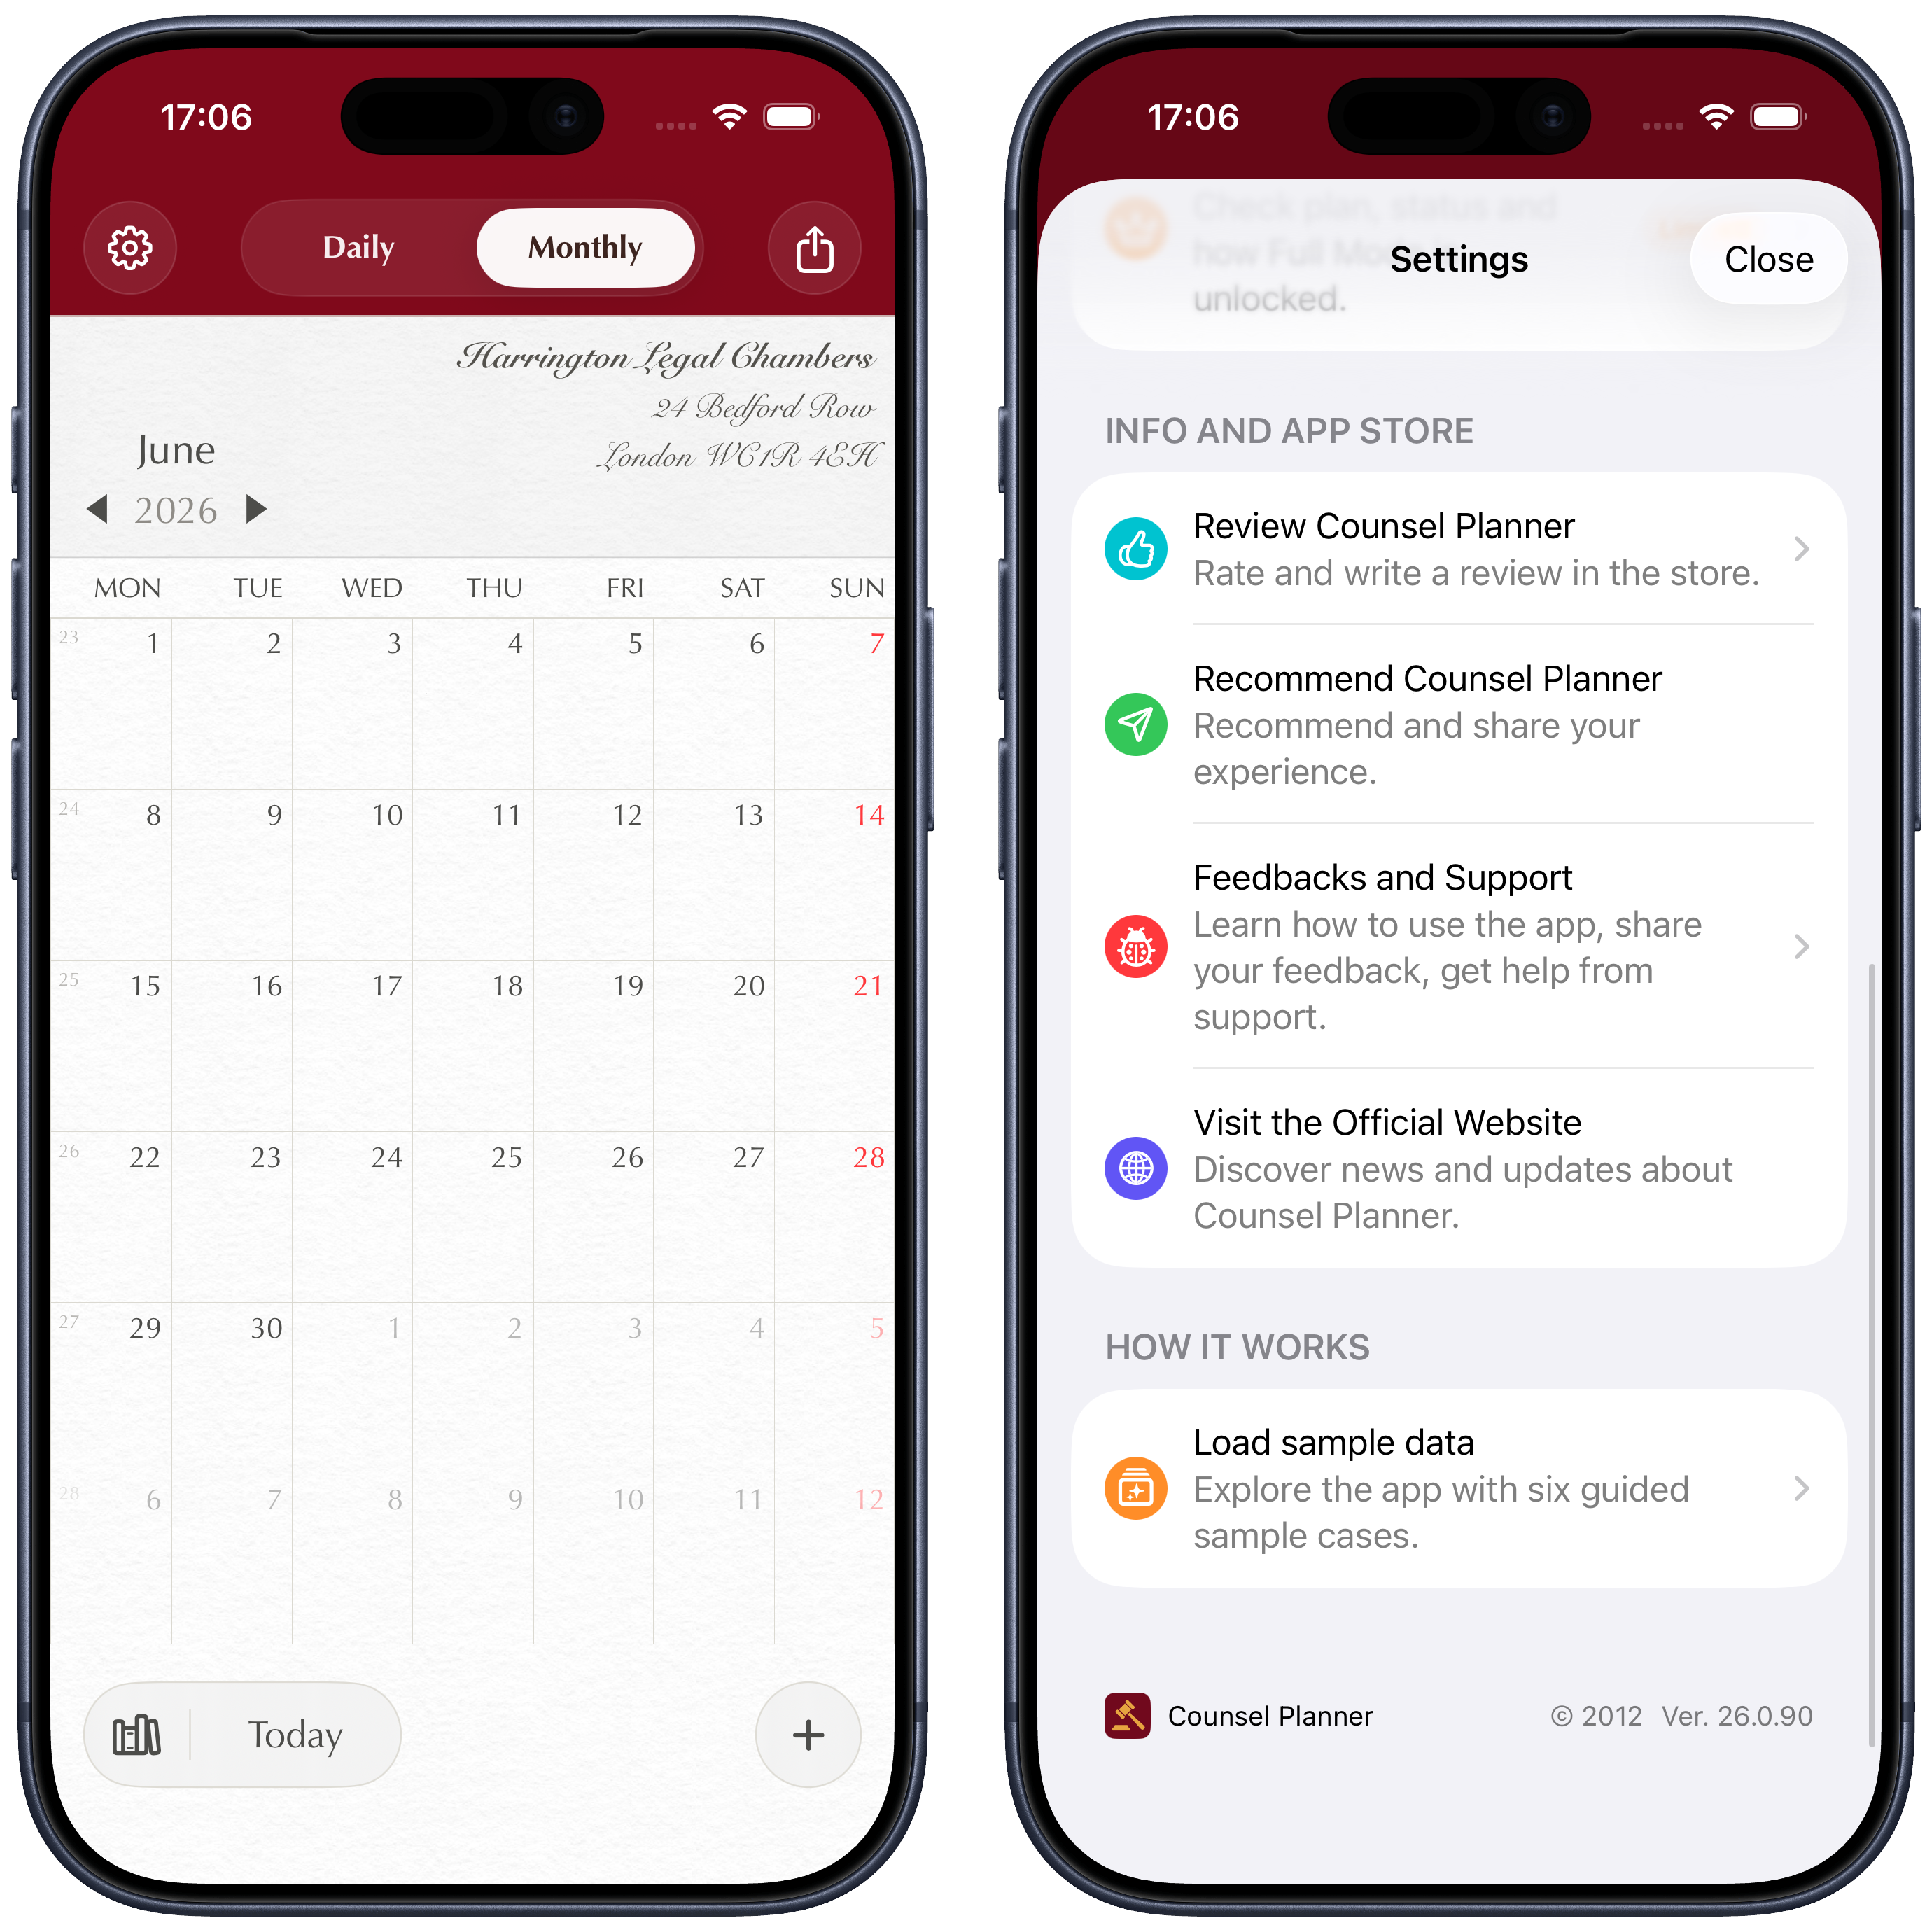
The app will automatically create a set of sample matters complete with hearings, deadlines and notes. You can explore every section freely: add entries, make changes, navigate between views — exactly as you would with real data.
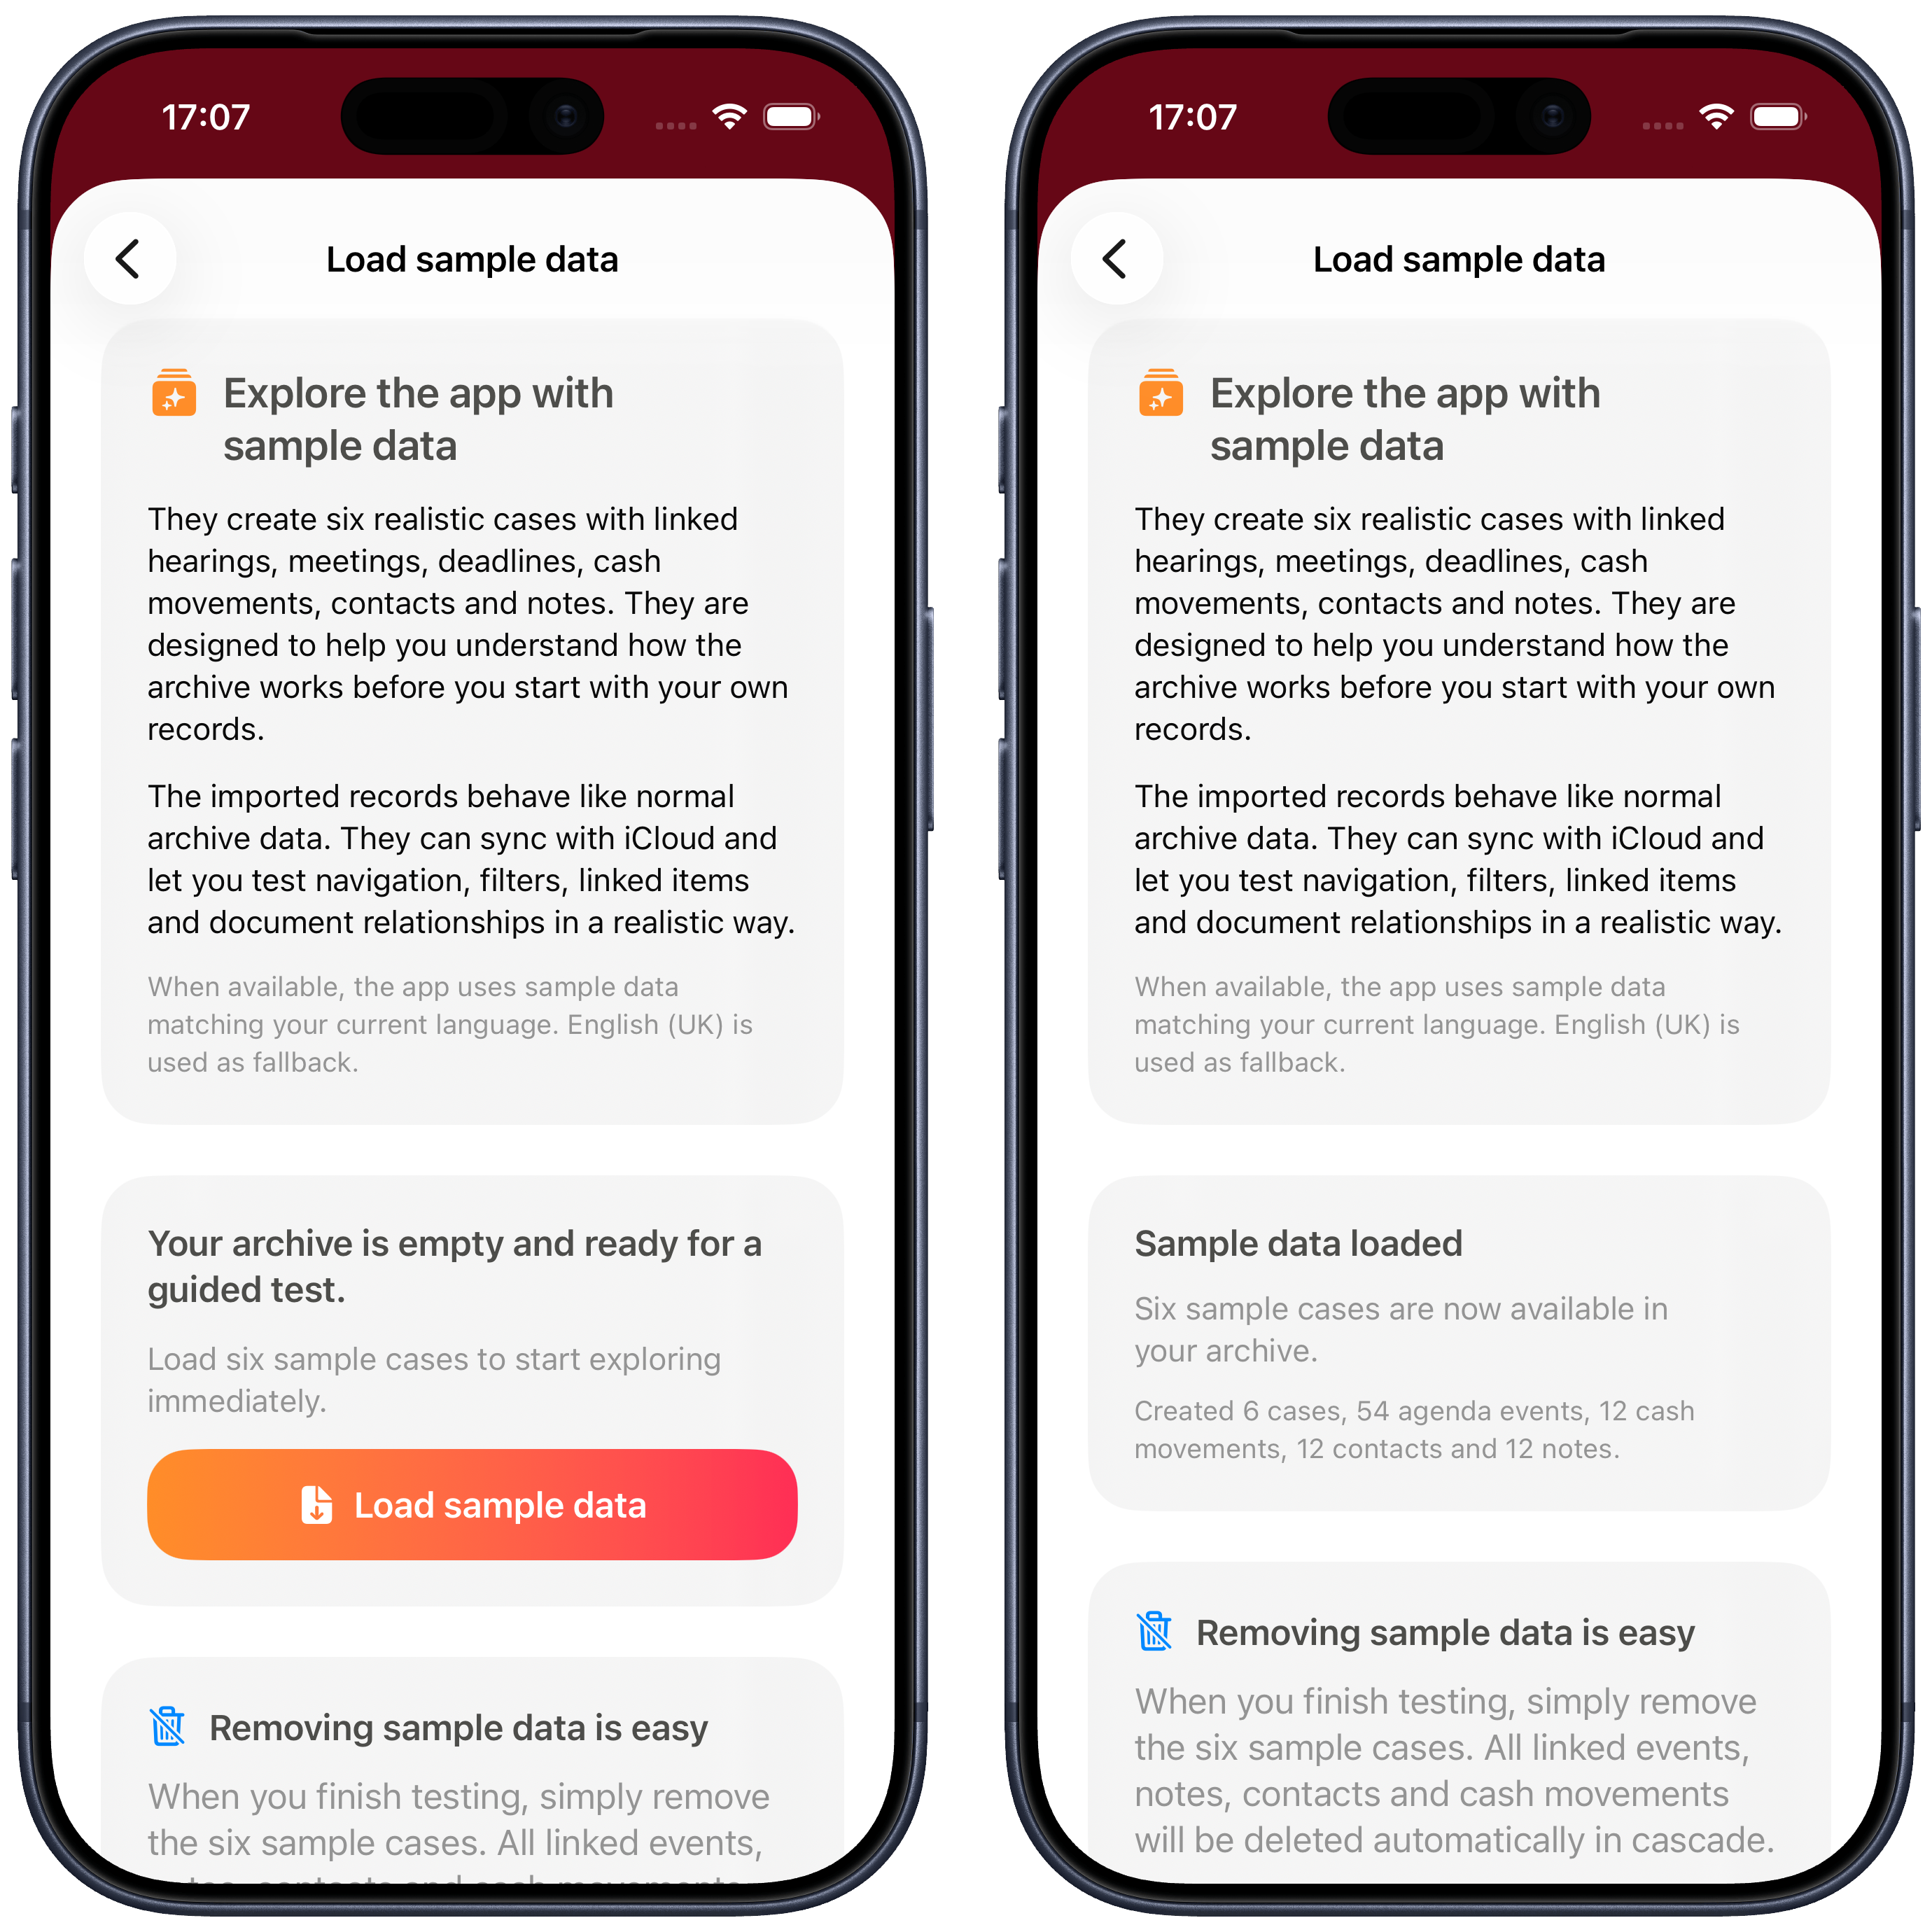
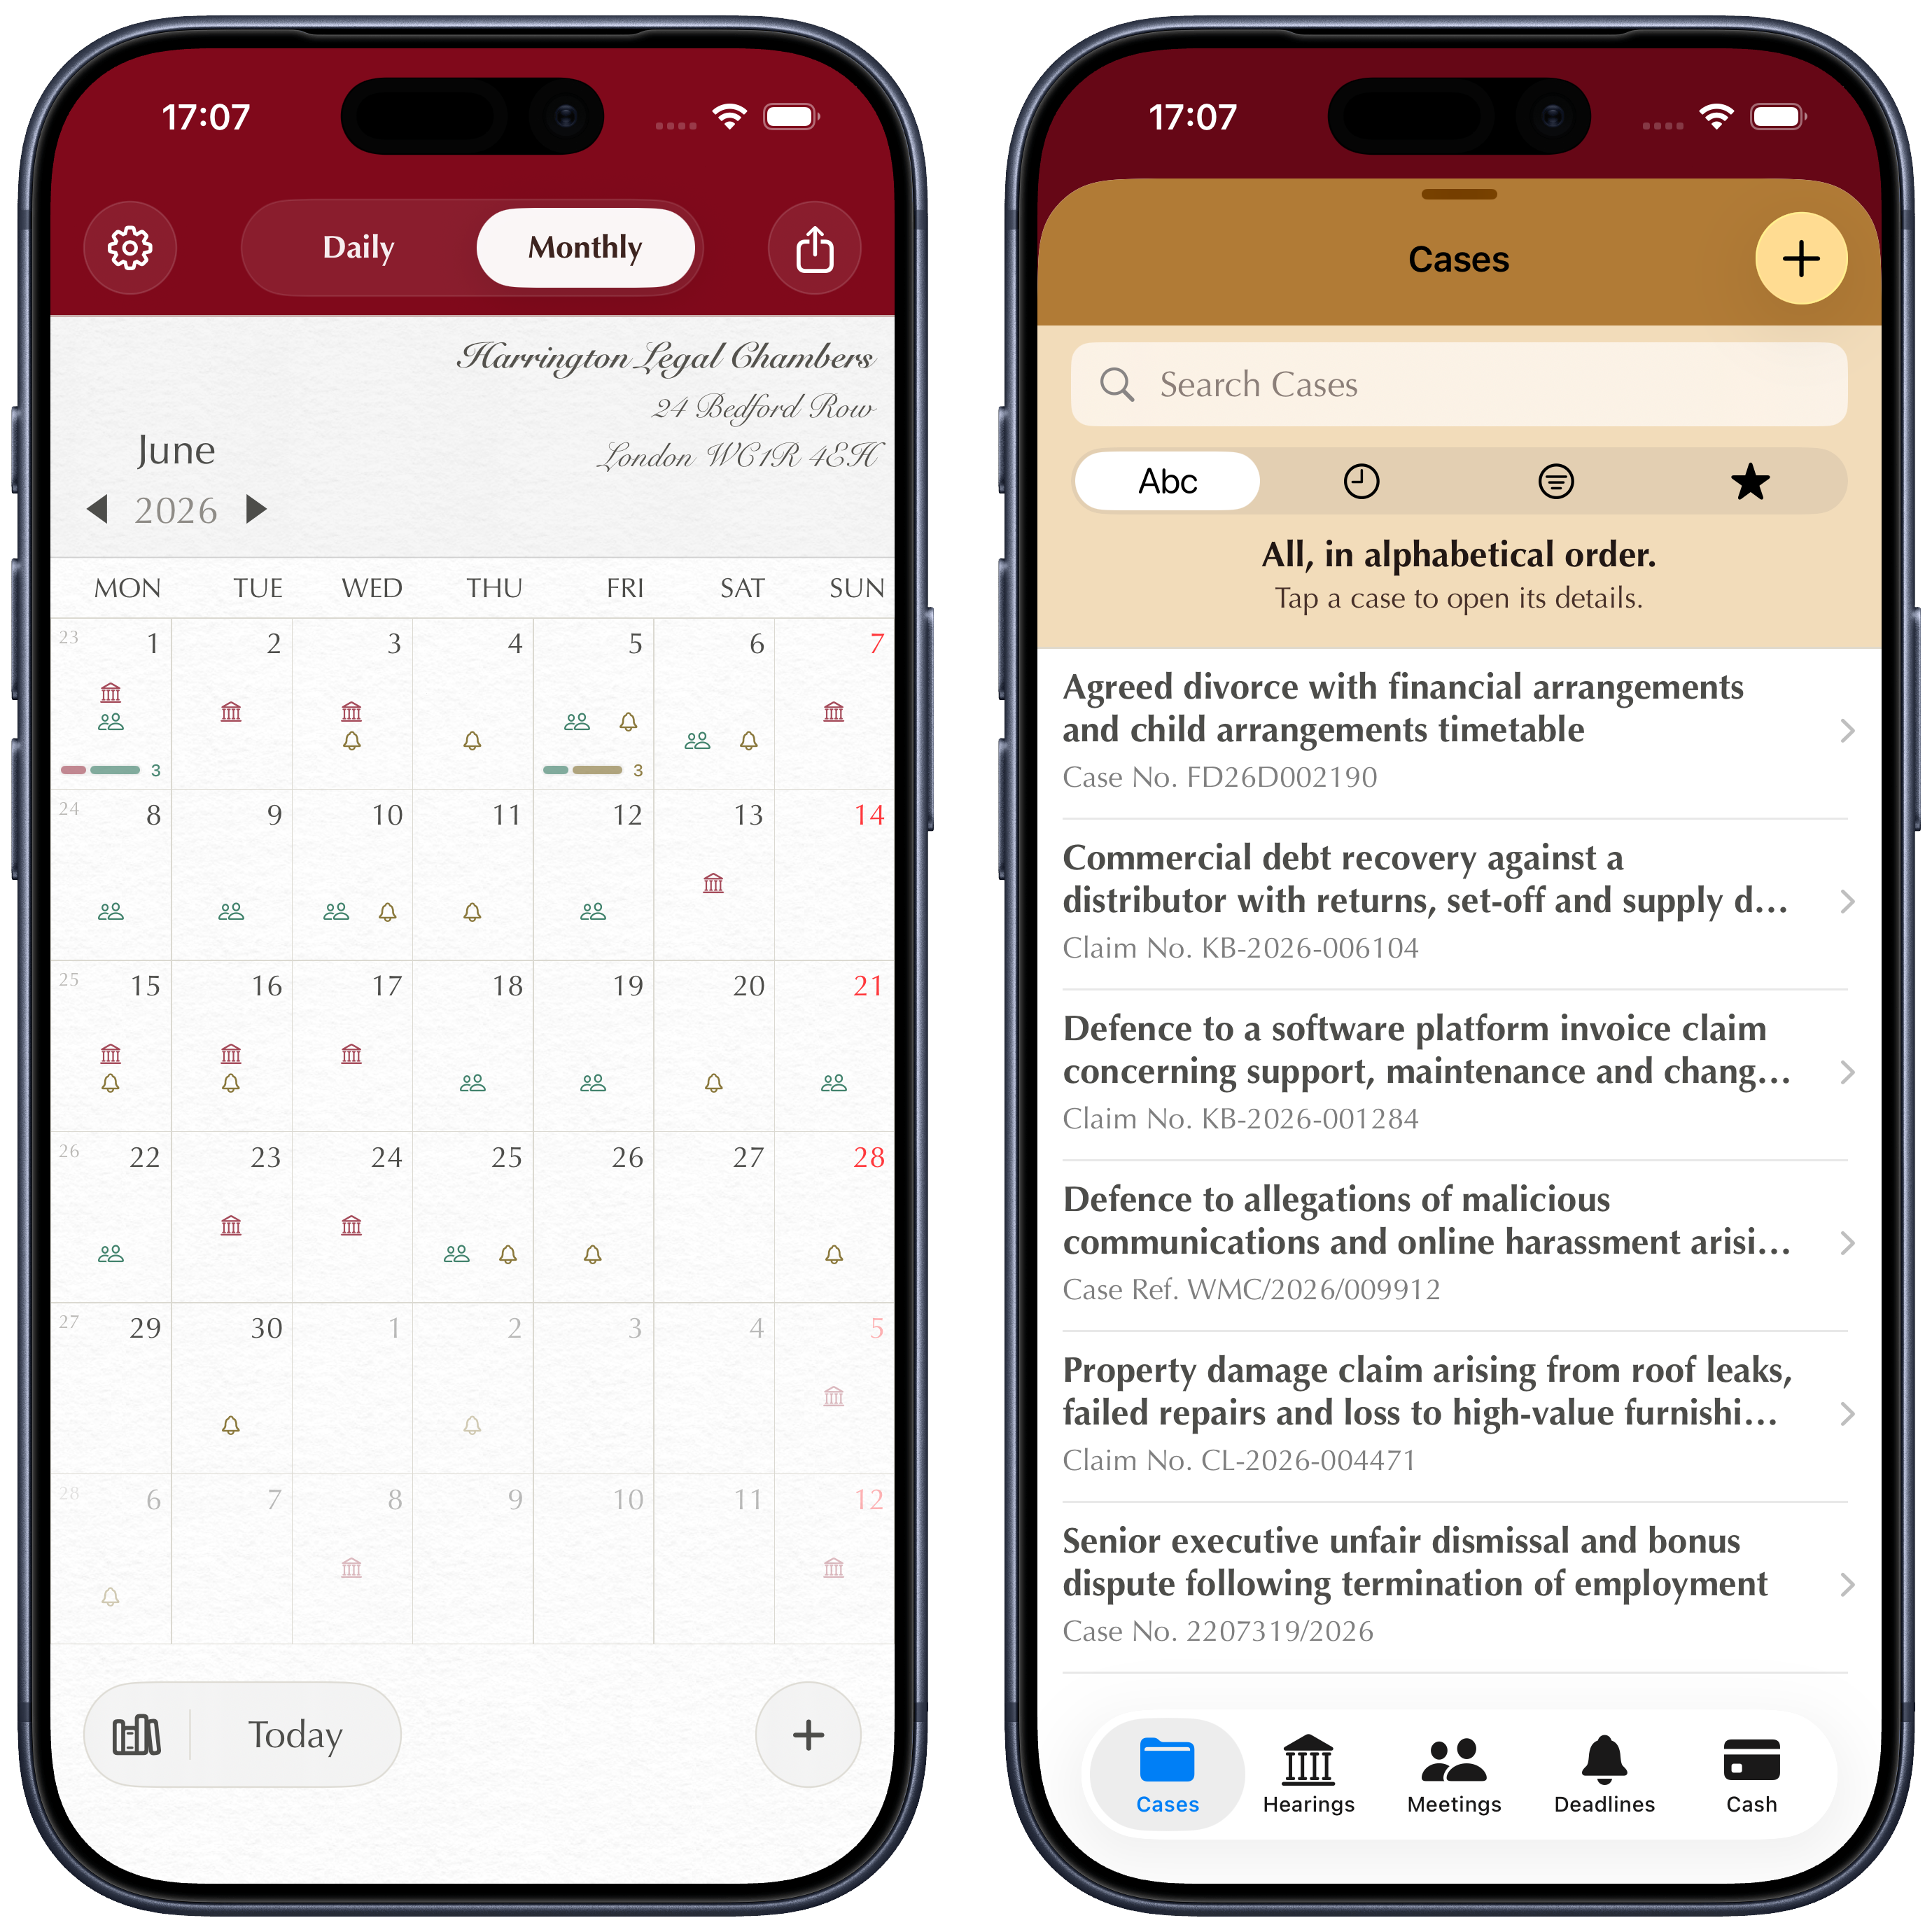
In the matter list you’ll find the 6 newly created matters; opening the monthly view will show hearings and deadlines spread across the calendar — exactly as yours will appear.
How to remove the sample data
When you’ve finished exploring and are ready to start with your real matters, it’s time to clean up. The sample data is removed by deleting the 6 sample matters one by one from the matter list.
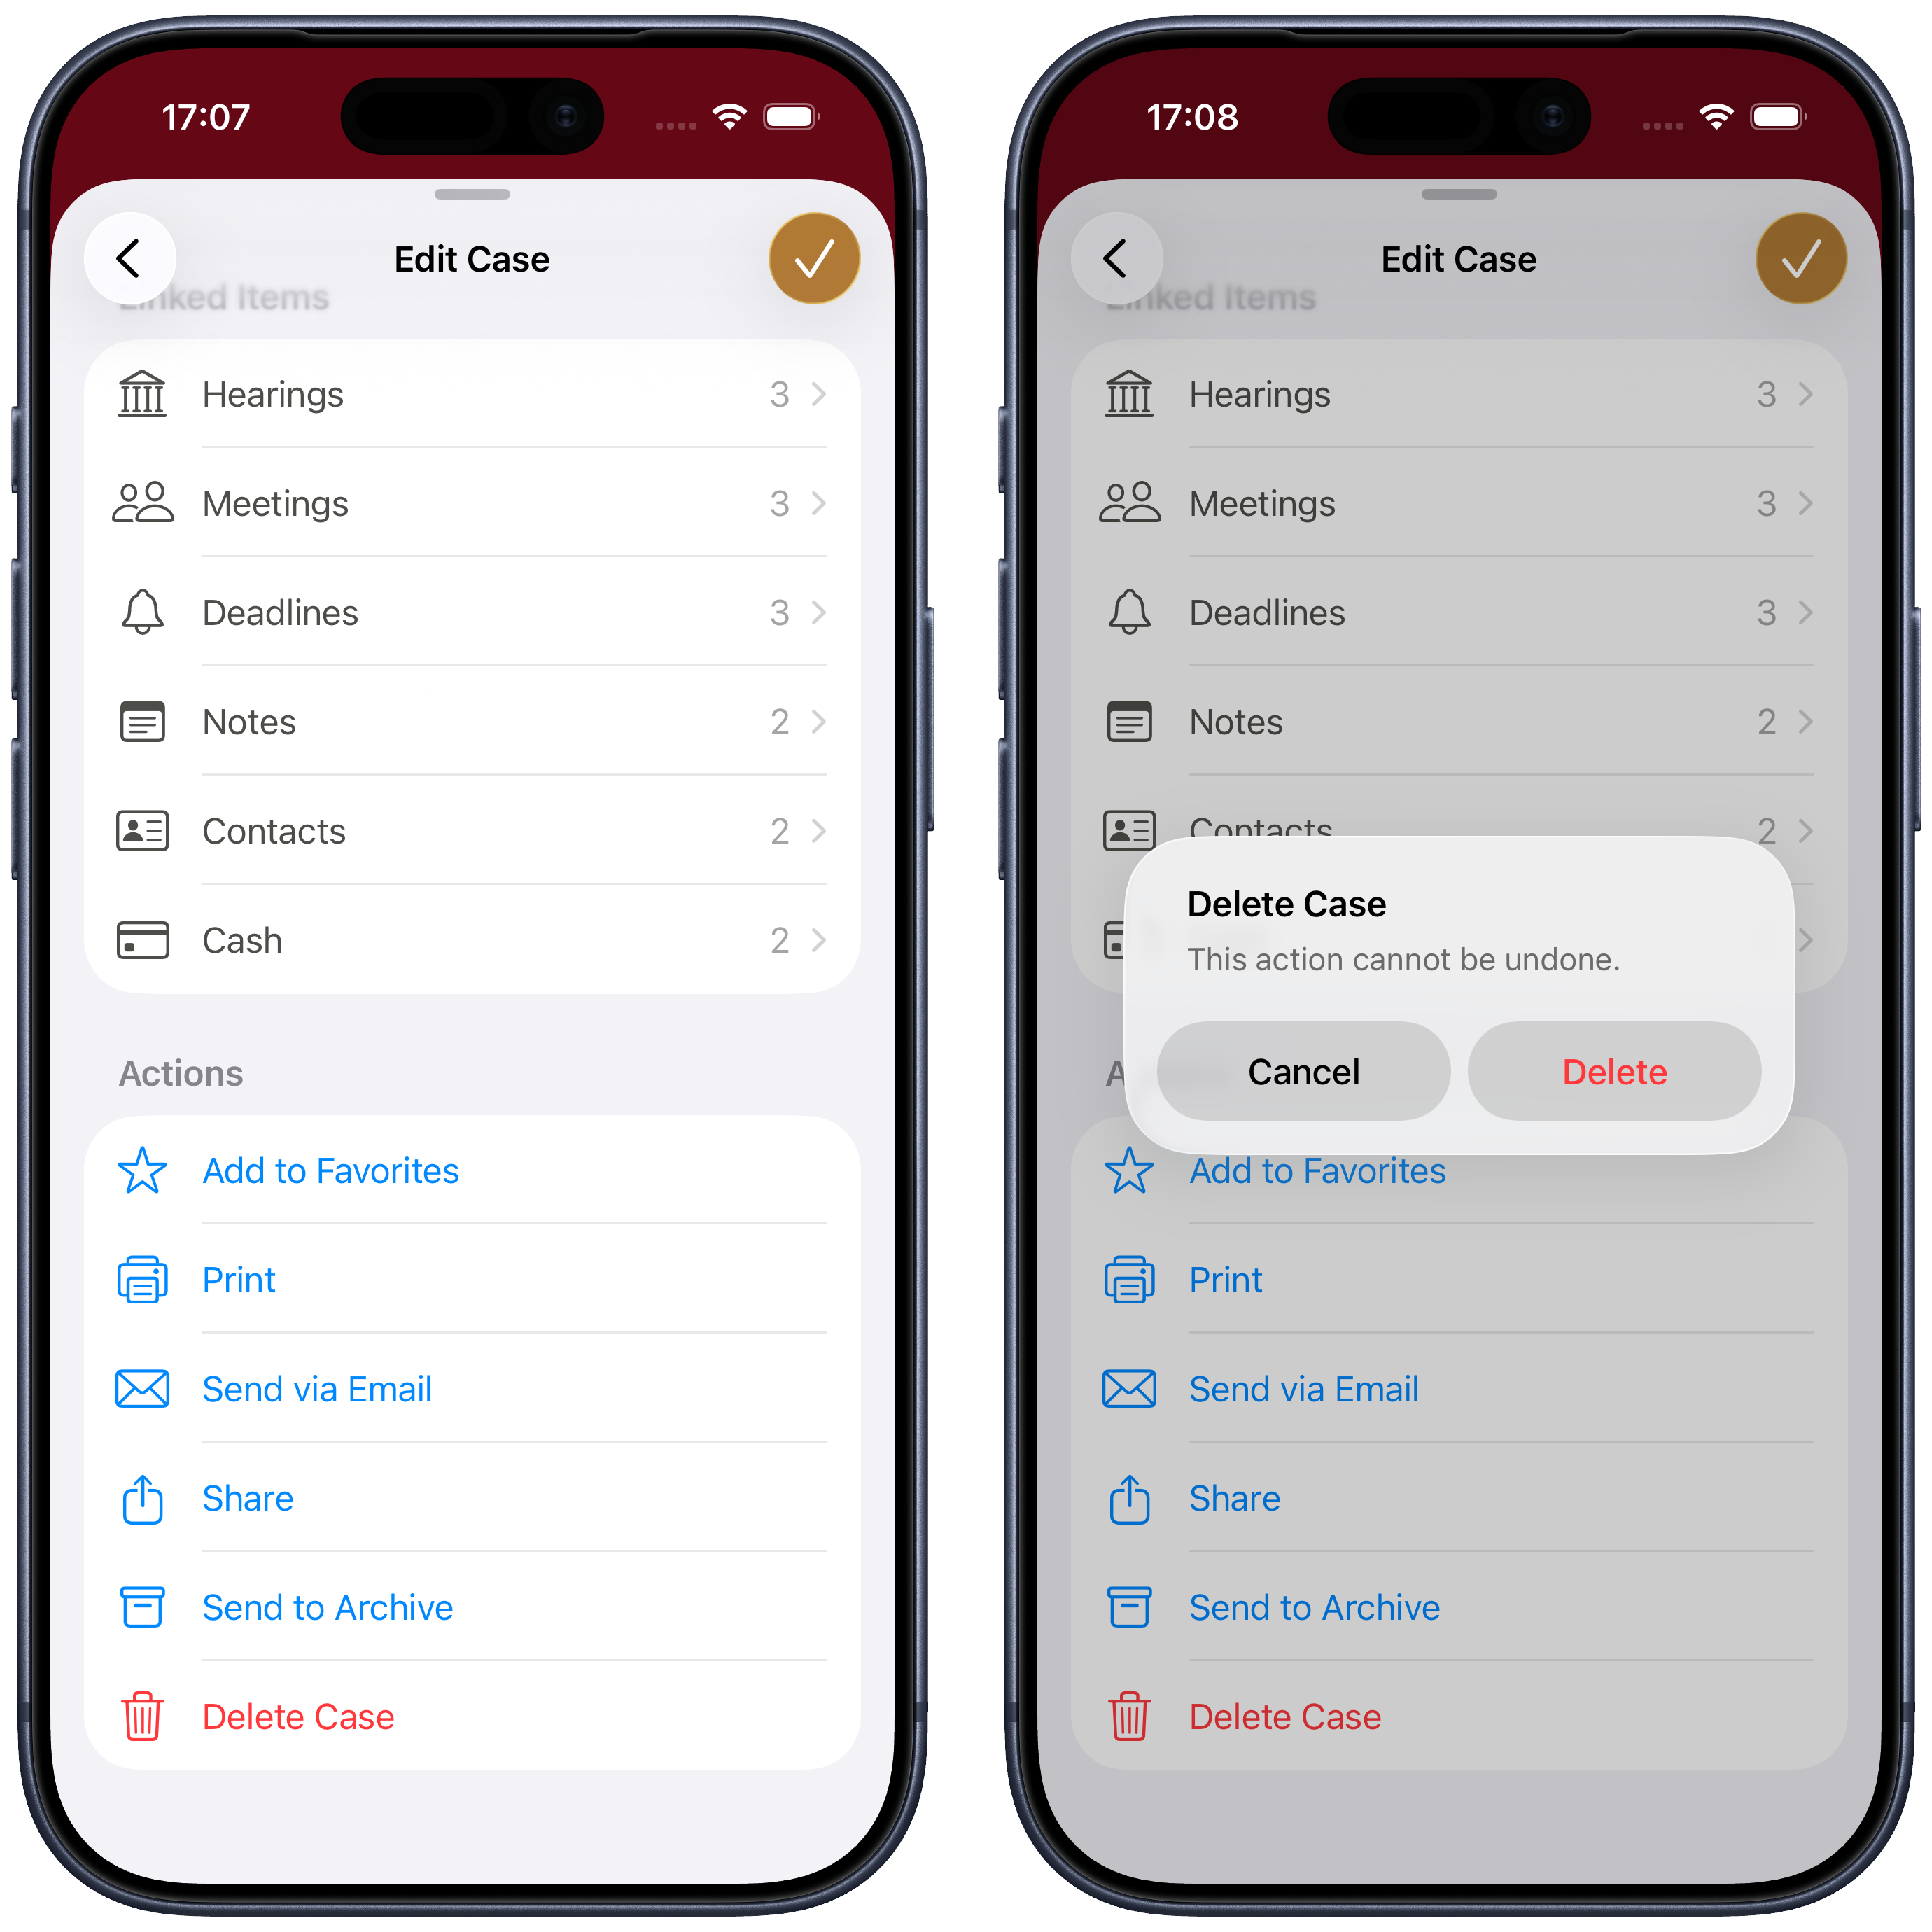
To delete a matter, open it and use the delete button. Repeat for each of the 6 matters.
Cascade deletion: what it means
This is an important point to understand — not just during the trial phase, but in everyday use too.
When you delete a matter, all content linked to it is automatically deleted as well: hearings, deadlines, notes, documents and any other associated entries. Nothing is left behind.
This behaviour always applies — including with your real matters. Before deleting a case file, make sure you no longer need any of the information it contains, because deletion is permanent.
Questions or something not working as expected? Write to us at support@counselplanner.app — we read everything and reply within one or two working days.